

The Night Lab.
eufy setup & settings.
From symptom to saved result.
Compare the problem. Find your model’s controls.
Make one change and test the recording.
Original illustration
Turn the clue
into a setup decision.
Part 1 explains how the scene shapes a night image. Here, we put those fundamentals to work with eufy: match a symptom to a visual example, choose your camera family and test the relevant setting or physical adjustment. Keep your original clip so you can judge what changed.
- Spot the symptomExplore the five comparisons.
- Find your modelUse its documented eufy controls.
- Save one adjustmentRepeat the walk and compare clips.
Every comparison uses one fixed AI-generated scene with illustrative lighting and optical effects. They are not eufy footage, test results or predictions of a model’s performance. The advice below is grounded in eufy’s own guidance.
Your after-dark workbench
Same scene.
A revealing difference.
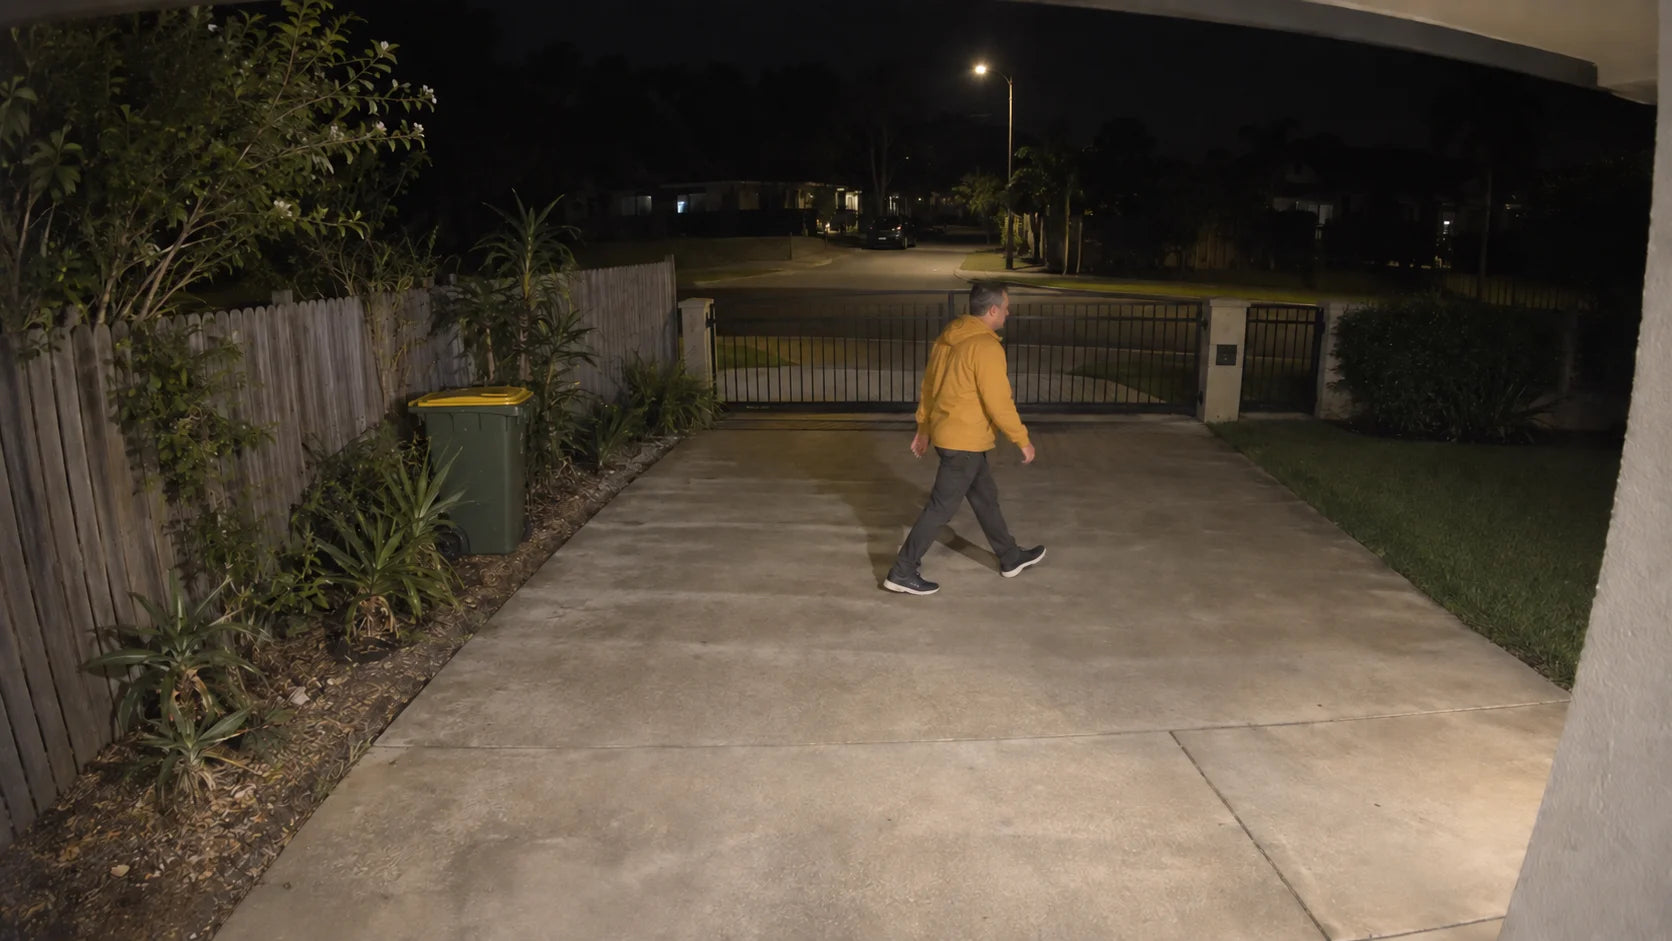
One of the example images could not load. The lesson and eufy settings below remain available.
Experiment 1 of 5
Let there be useful light.
Infrared commonly gives a black-and-white view. Visible light can reveal colour; the best night mode depends on your eufy model.
What to notice
Look at the jacket and the gate, not just the brightness. The colour and infrared-style treatments illustrate the kinds of detail to inspect. They do not measure a camera’s performance.
Try with your eufyCompare your normal night recording with a porch light on and off. If your camera offers adjustable light brightness, test that too. Keep glare out of the lens. Follow the brightness test below. [1]
Experiment 2 of 5
Give infrared some room.
A wall or eave close to the camera can return infrared light into the lens. eufy documents this on SoloCam and Floodlight models.
What to notice
Follow the overexposed wall at the right edge into the softer glare spreading across the person and gate. The nearby surface returns too much infrared to the camera, reducing contrast farther into the scene.
Try with your eufyCheck for a bright wall or eave. If accessible, adjust the camera away from it and repeat the night test. Check that your important area stays in view. [2]
Experiment 3 of 5
A window can become a mirror.
A window can reflect room lighting into the picture. On models using PIR, the pane also interferes with heat-based motion detection.
What to notice
The reflected lamp washes over the person’s head and jacket, making the outside scene harder to read. Removing that reflection from the example does not prove that a camera behind glass will detect motion.
Try with your eufyReview the night clip and test alerts separately. Only install an outdoor-rated camera outside. An indoor camera does not become weatherproof when moved. [3]
Experiment 4 of 5
Tiny things. Very bright clues.
eufy identifies webs, dust and water droplets as causes of poor night images. Near the lens, a small obstruction can dominate the view.
What to notice
The web catches infrared close to the lens: bright, defocused strands and glare obscure the person behind them. Compare with a clear cover, or switch to droplets above.
Try with your eufySave a clip. Clean the accessible outer lens or cover following your model’s care instructions, then repeat. Use a soft, non-abrasive cloth; avoid scraping. [4]
Experiment 5 of 5
Now put the night view to work.
Judge a person moving through the area you care about. More suitable light can help, but your camera and scene determine the result.
What to notice
The fence stays sharp while the person blurs in the dim-light example. This is an invented illustration of a moving-subject problem, not a promise that a setting will reproduce the other image.
Try with your eufyWith their permission, record someone walking across the view. Raise the camera’s light brightness one step if available, or test a well-aimed external light. Compare saved clips for moving detail and glare. Open the brightness and timing test. If the event is missed, check Motion Detection separately below. [5]
These controls affect this page only. No camera is connected. Different eufy models offer different night modes; the examples are not a calibration tool.
A little light science
Follow the light.
Find the interference.
Infrared has to reach the scene and return useful detail. A nearby web can reflect it straight back towards the camera instead. [4]
From the lab to your phone
Find it in
the eufy app.
Start on Home, choose your camera and open its settings using the gear or … menu shown for that device. Select a camera family below for its documented night-vision controls.
Using the redesigned eufy app? Security modes now live under Smart → Modes. Older eufy Security screens and support screenshots may use different entry points. The paths here start at the device’s settings; labels still vary by model and app version. [6]
eufyCam / E / 2 / 2 Pro Auto Night Vision
Enable Auto Night Vision for an automatic night view. These named models use this control; it is not a built-in spotlight switch. Compare a saved night clip under your usual lighting. [1]
eufyCam 2C / 2C Pro Spotlight night view
The 2C Pro FAQ gives this path. eufy’s family guide confirms that 2C and 2C Pro support colour at night with their spotlight. If your app shows this option, compare it with the black-and-white night view and review the result. [1]
Floodlight Cam 2 Pro Colour and IR reflection
Use this model’s colour-night option for the lighting test. For a nearby wall reflection, eufy also documents Video Quality → Night Vision Effect Adjustment to turn off infrared settings. Review a night clip after the change; reduced reflection is useful only if you still see the required area. [2]
Indoor / Outdoor Cam Family guidance
eufy’s Indoor/Outdoor Cam guide documents this switch. Use it if your exact model shows it. The guide also discusses spotlight-equipped models; it does not mean every Indoor Cam has a spotlight. Keep an indoor-only camera indoors. [7]
Video Doorbell Family guidance
This is the control in eufy’s doorbell night-vision guide. Enable it if your doorbell shows it, then check a recorded approach to the door. Night modes and built-in lights differ between doorbells. [7]
SoloCam S340 Automatic night vision
Enable Auto Night Vision if shown. eufy’s battery-camera support guide documents this route; use it when these labels appear on your S340. The article starts at Devices → … → gear; in the redesigned app, select your camera from Home first. This path is not evidence that S3 Pro or S4 use the same menu. [11]
S4, S3 Pro or another model Check the exact model
Open the device’s settings and use the night-vision section actually shown by your model. Do not borrow the 2C or Floodlight Cam 2 Pro breadcrumb if the menus differ. The physical checks in this lab still help you test lighting, reflections and lens obstructions.
For eufyCam S3 Pro: eufy documents Standard and Daylight night modes, but the source does not provide a model-specific tap path. Use your camera’s own night-mode screen and compare saved clips. [11]
For eufyCam S4: eufy says activating red/blue alarm lights temporarily changes colour night vision to black and white. That behaviour is expected. [10]
Give movement a little more light
Light the person.
Test the recording.
If your eufy has an adjustable spotlight or floodlight, its brightness is worth testing. More light on the subject can allow a shorter exposure and reduce motion blur; your model’s automatic exposure and processing still determine the result. [14]
Adjust the light output. A screen-brightness control only changes how you view the image. It does not add light to the person outside.
- Start with a saved walk.
Record someone, with their permission, crossing the important area at your usual light level. Keep the same path and pace for the next attempt.
- Increase one step, where available.
Raise the camera’s light brightness a little and repeat. Keep the level that reveals useful moving detail. If a face or nearby wall washes out, reduce the light or change its aim. Maximum brightness is not automatically the best setting.
- Check when the light arrives.
For a motion-activated light, review the start of the saved event as well as the middle. Confirm the person is lit before reaching the area you need to see, and that the light stays on through the walk. A clearer live view alone does not confirm that the event recorded properly.
Floodlight Cam 2 Pro
Adjust the light settings for the mode you actually use. Ambient Light and App Control have separate settings. eufy’s Fast mode activates on motion; Smart waits for a person detection. Test Fast if the light arrives late, and check for unwanted activations. [12]
Wall Light Cam S100 / S120
eufy documents brightness adjustment here. The wired S100 can keep its light on; the solar S120 cannot provide continuous lighting and turns it off in standby to conserve battery. Test its motion-triggered recording. [13]
Another eufy model?
Use a spotlight or light-brightness control only if your model provides one. A night-mode switch does not prove there is a brightness slider. If you cannot adjust the light, compare the available night modes or test an external light aimed at the subject. Use the exact-model guides above.
Getting the event as well as the picture
Make the walking test count.
Use the same path and lighting for each attempt. Check the saved event and the notification separately.
- Test the trigger.
For supported eufyCam, SoloCam and Floodlight Cam 2 Pro models: Camera Settings → Motion Detection → Motion Test Mode. Walk through the area you need. The test slider does not save your normal sensitivity. [8]
- Save sensitivity and the zone.
Open Camera/Doorbell Settings → Motion Detection → Detection Sensitivity to make the lasting adjustment. If an Activity Zone is available, open Motion Detection → Activity Zone → +, drag its edges around the required area and tap the checkmark. Scales and zone shapes vary. [8] [9]
- Check the active mode.
In the redesigned app, open Smart → Modes. Check the selected mode’s recording and notification options for that camera. Older screens call these Video Record and Push Notifications under Security → Home/Away. Repeat the walk and inspect the saved event. [6] [9]
Keep the useful bits
Choose the right
eufy adjustment.
Use these model notes to choose what to try. The app paths above apply only to the named cameras; a physical obstruction still needs a physical fix.
Colour starts with the scene.
The lighting comparison is a reason to test, not a ranking of night modes. On the eufyCam 2C and 2C Pro, eufy documents colour night vision with the spotlight enabled. Other models use different combinations of ambient light, IR and built-in lights.
Start with the current mode and save a clip. Change one available lighting option, then compare the detail you need. On eufyCam S4, the red/blue alarm lights temporarily switch colour night vision to black and white; eufy says this avoids colour interference. [1] [10]
A bright corner is a placement clue.
For SoloCam and Floodlight Cam 2 Pro, eufy recommends keeping nearby walls and eaves out of the IR reflection path. Check placement before increasing other settings.
A real angle change will also change the framing. Our fixed scene deliberately holds the framing still to isolate the flare. Floodlight Cam 2 Pro has a specific Night Vision Effect Adjustment control; that breadcrumb is not universal. [2]
Glass changes the picture and detection.
A pane may reflect the room into a night view. eufy also warns that PIR motion sensing can be blocked by glass. The Indoor Cam 2K Pan & Tilt FAQ separately describes window reflections affecting its image-based detection.
A clearer live view does not establish reliable alerts. Test both. Follow the exact model’s indoor/outdoor rating and mounting instructions. [3]
Check the first few centimetres.
eufy’s E40 night-image guidance identifies webs, dust and water droplets near the lens as possible causes of blur and reflections. Similar-looking haze can have more than one cause.
Inspect the outside surface without dismantling the camera. Clean only as your model allows, using a soft, non-abrasive cloth, and save another night clip. The change in your own recording is the useful evidence. [4]
Separate recorded detail from alerts.
Our dim-light example keeps the fence sharp while the moving person blurs. eufy’s tracking guidance recommends more suitable night lighting when subjects are unclear. The precise improvement varies by camera, subject and scene. Test an available light-brightness control, or consider a sensor light if the subject remains poorly lit. Watch when it switches on as well as how bright it gets.
A Detection Sensitivity or Activity Zone change affects triggering; it does not sharpen a recorded face. Use the walking test to check image detail, then the motion controls to check whether the event is captured. This guide does not assume that your eufy app exposes shutter-speed or gain controls. [5] [8]
Beyond the camera
A sensor light can earn its place.
Consider one where a dark approach stays poorly lit after testing your camera’s own light. It can make movement easier to see, help illuminate a recording and give people at home a cue that something is outside. Queensland and South Australian police recommend sensor lighting as part of home security. [15]
For the camera: test the timing.
A light that switches on after the person has passed does little for that part of the clip. Set the separate light’s own sensor and duration controls, then repeat your recorded walk. Aim it at the approach, keep the bright lamp out of the camera’s view and avoid glare towards neighbours or traffic.
Check the closest and furthest parts of the walk for washed-out faces, deep shadows or a delayed change into colour. Compare the saved event before deciding whether more brightness or another light is worthwhile.
For deterrence: one useful layer.
Lighting can make an approach more visible and may discourage opportunistic offending. Its value depends partly on whether someone can see or respond to that activity. Keep access points secure and sight lines clear; a light cannot guarantee that an intruder leaves. [15] [18]
Our practical recommendation: try the lighting you already have first. Add a sensor light when it solves an observed dark spot or late illumination, then verify the result with your eufy recording.
What the research actually measured
Households: a study of 37,416 households in England and Wales found exterior timer-or-sensor lighting was associated with lower burglary risk. It compared existing security arrangements, rather than randomly installing lights, and grouped timers and sensors together. That supports considering lighting alongside locks; it does not prove a sensor light alone caused the difference. [16]
Public streets: a 2022 systematic review included 21 studies and reported 14% lower total crime in treatment areas compared with controls. Its eligibility rules explicitly excluded private exterior sensor lighting. That percentage is not an estimate for a light at your home. [17]
Take it outside
Your eufy
setup record.
Part 1 gave you the baseline. Use this checklist to keep track of the change you tested and the result you saved.
0 of 5 checks complete
Ticks are saved on this browser when storage is available. No camera footage or account details are collected by this checklist.
The research behind the lab.
Official eufy guidance, technical imaging references and crime-prevention research, checked 22 September 2026. The named model beside each control matters. App labels and feature availability can change with the camera and app version.
- Night-vision controls by eufy camera familyeufyCam / 2 / 2 Pro and 2C families · 2C Pro spotlight FAQ
- Placement and reflected infraredSoloCam placement · Floodlight Cam 2 Pro controls
- Glass, reflections and motion sensingPIR and glass · Indoor Cam 2K Pan & Tilt FAQ
- Lens obstructions and cleaningeufyCam E40 night-image troubleshooting · Floodlight lens care
- Lighting and unclear moving subjectseufy tracking-image guidance
- Current eufy app navigationRedesigned eufy app: Home and Smart → Modes · Updating the app
- Additional family night-vision pathsIndoor / Outdoor Cam · Video Doorbell
- Motion test and sensitivityMotion Test Mode is temporary; Detection Sensitivity is saved
- Activity zones and recording permissionsCreate and save an Activity Zone · Video Record and Push Notifications in the selected mode
- eufyCam S4 alarm-light behaviourWhy alarm lights switch the night image to black and white
- SoloCam S340 and S3 Pro model guidanceeufy battery-camera automatic night-vision path · S3 Pro Standard and Daylight modes (German)
- Floodlight Cam 2 Pro brightness and activationLight Settings, Fast and Smart activation · Adjustable light brightness
- Wall Light Cam S100 / S120 light controlsBrightness path and continuous-lighting differences
- Why lighting and exposure matter for movementAxis technical explanation of exposure and motion blur — general imaging principles only; not an eufy feature or performance claim.
- Australian police advice on household sensor lightsQueensland Police Home Security Guide, page 2 · SA Police lighting advice
- Household burglary research: observational evidenceTseloni et al., The effectiveness of burglary security devices (2017) — exterior lights on timers or sensors were grouped together.
- Public street lighting: a different interventionWelsh, Farrington & Douglas systematic review (2022) · Author-posted full text; private sensor lights excluded
- Lighting placement, visibility and limitationsNSW Police security-lighting assessment · U.S. DOJ COPS, Burglary of Single-Family Houses
Original imagery created for CamGuard Australia with AI image generation. A single fixed scene and separately generated optical effects explain possible image problems; these are not recordings from eufy products. This guide does not promise a detection distance, identification outcome or particular camera performance.